
 The first time I laid eyes on a spider sinker setup, I thought it was a fad–one of those fishing gadgets that would soon be forgotten. Today, more than 20 years later, I’m still using it. From where and whom it came from, I’m not certain, but I do know the spider is one of the most effective sinker setups I’ve ever used when it comes to backbouncing and even drift fishing spring chinook. The spider has decreased my amount of lost sinkers by over 75%, and increased my fishing time and catch rates.
Over the years I’ve written a good bit about spider sinkers and how to craft them. But the more I talk with people, the more I realize this is one of those times when pictures tell more than words.
Constructing your own spider sinker setup is simple. Here are the steps I follow when making mine.
Materials: Start with stiff wire, something at least of size #14, 220 pound test steel leader. This is stainless steel leader used in big game fishing. Be sure the wire is stiff, as it needs to support your sinker. This wire is what makes the spider, so be sure it’s sturdy for the amount of lead you’ll be using. The size #14 wire is good when fishing two to four-ounces of lead.
A softer steel wire is ideal to create the clasp that will hold the sinker. This wire will also be wrapped around the collar of the spider, securing the legs in place. A 26 pound wire works well well for this. A pair of standard pliers and needle nose pliers will help to twist and bend the wires where necessary.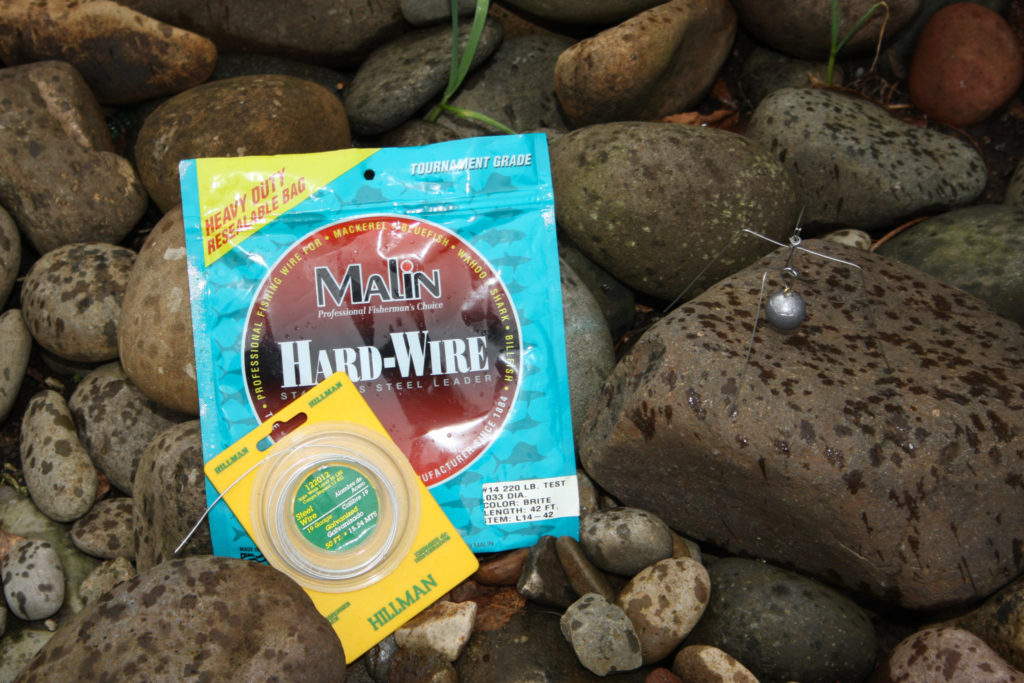
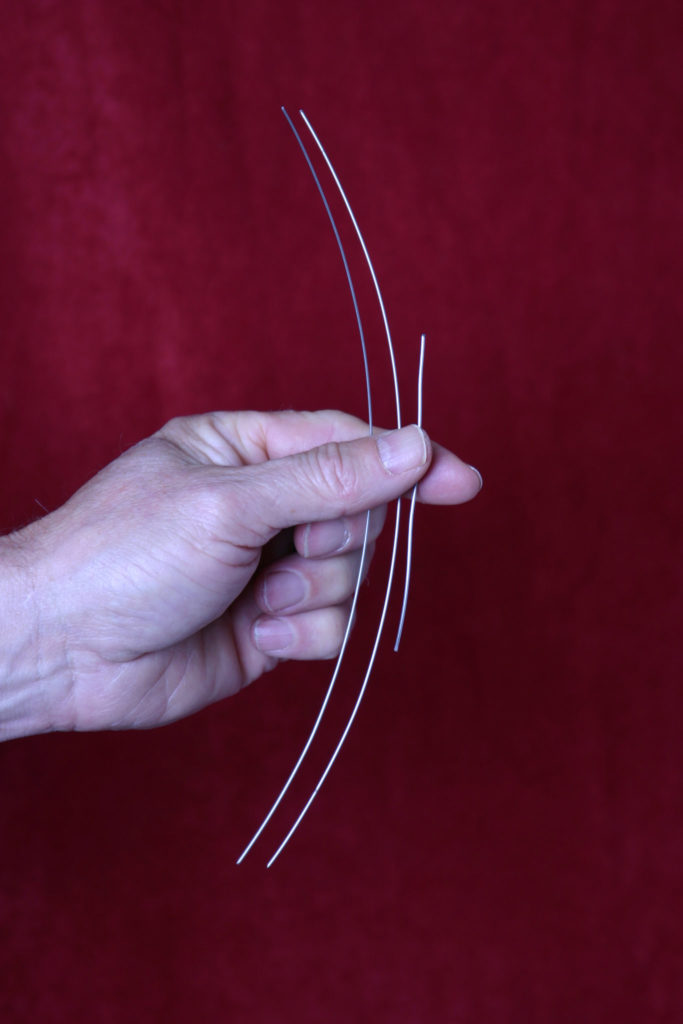
Step 1: Cut two, 10″ long pieces of steel leader. The length of these pieces determine how long your spider legs will be. The longer the pieces, the longer the legs. The more spiders you create, the more familiar you’ll become with it’s functions. Cut one, 4” piece of the softer wire. This will be used in a couple steps to bind the legs together and craft a clasp to hold the sinker.
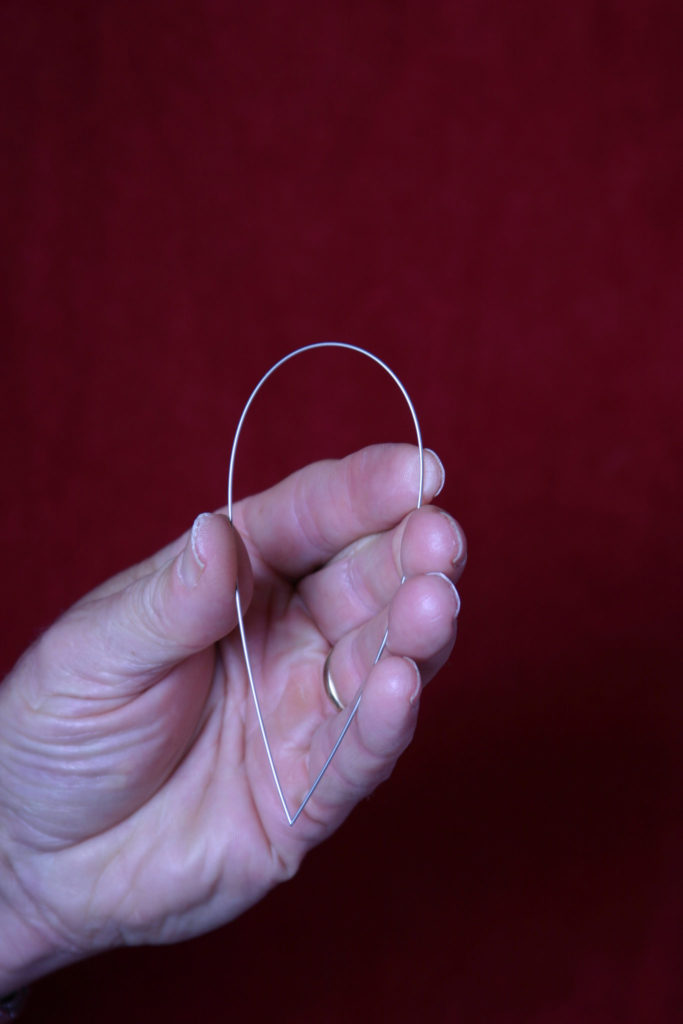
Step 2: Bend one of the 10” wires in half, so a small loop forms at the midpoint. Pinch the wire firmly so it creates a loop of approximately 1/4″ in size at the top. Bend the other piece of 10” wire in half, just like the first.
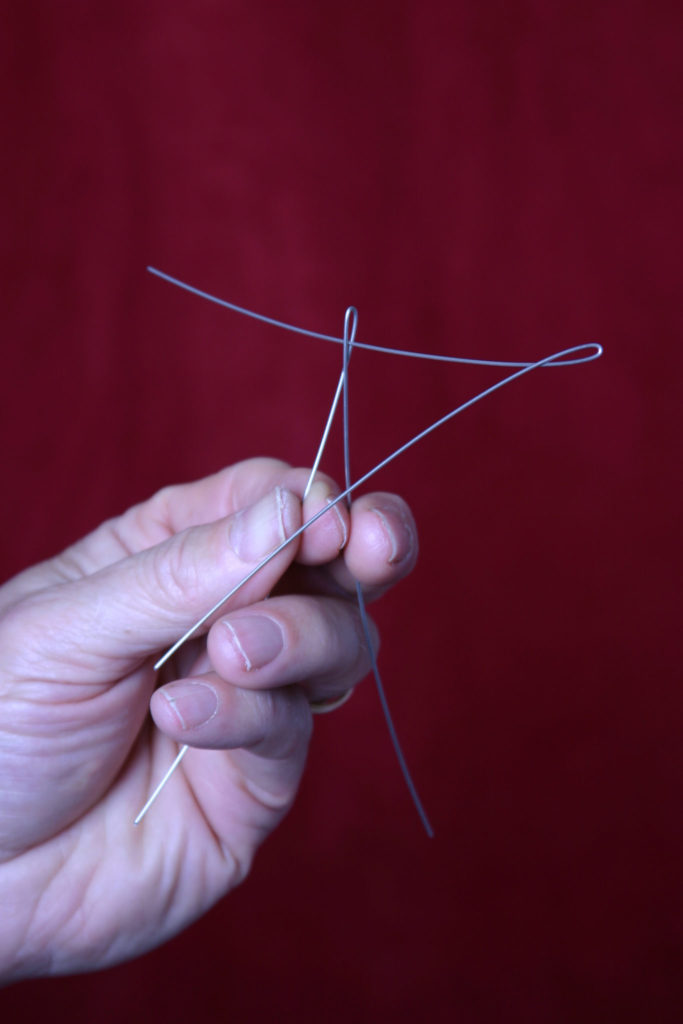
Step 3: Slide one leg of the bent wire through the loop of the other. Align both wires so the loops lay side-by-side.
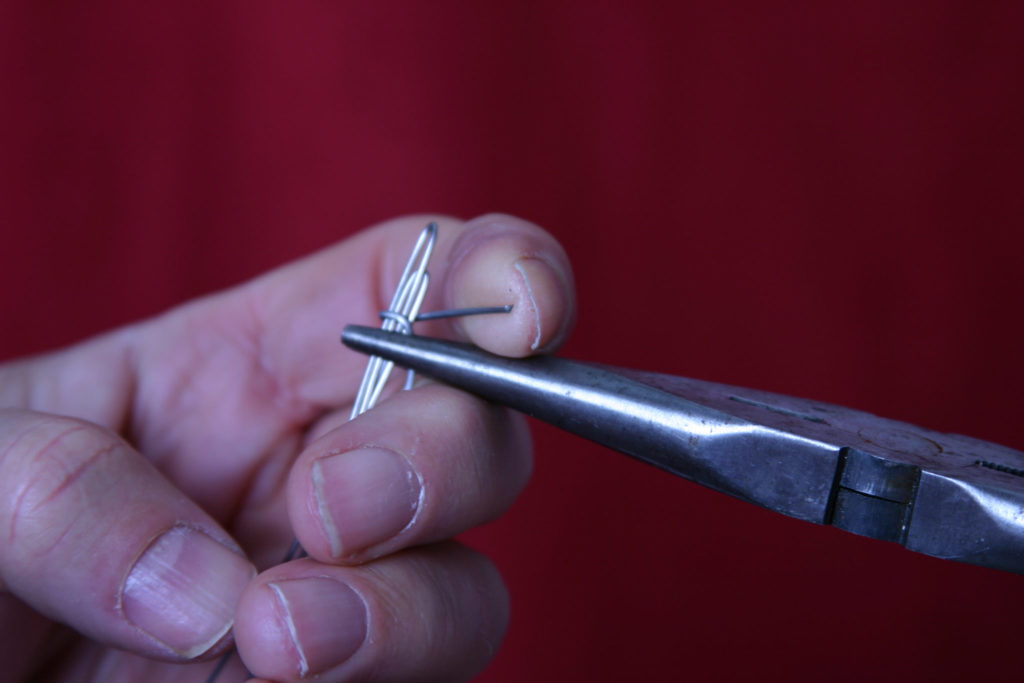
Step 4: Take the 4” piece of softer wire and run it 3/4 of the way through both loops of the longer wires. With the remaining 1” of softer wire sticking out the top of both loops, take the needle nose pliers and firmly wrap it around the base of both loops. You will likely need to hold the wires below the loop in place with standard pliers, as the stiff wire is hard to hang on to with bare fingers. Using two sets of pliers will ensure the legs get firmly wrapped, whereby adding needed stability to your soon-to-be spider.
Step 5: Check to make sure the legs of the spider are firmly held in place. If not, make a wrap or two around the legs of the spider with the short, softer piece of wire that’s left hanging. The end of this shorter wire will become your sinker clasp, so don’t wrap it too many times around the hard wires as you don’t want to make it too short. You can also wrap one of the stiff wire legs around the others, but you’ll need two sets of pliers in order to twist it tight so there’s no slipping.
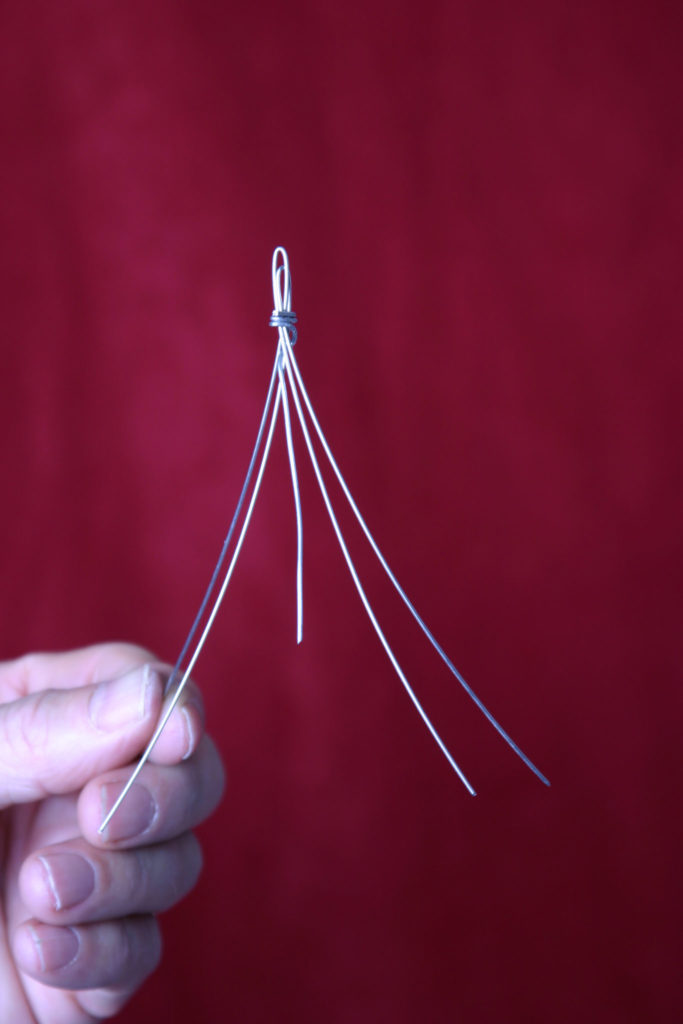
Note: At this stage, I slip all the legs of the spider into a 1” long piece of surgical tubing. This allows them to lay flat, meaning a dozen or more can easily be stored in a tackle box. The remaining steps are carried out on the river.
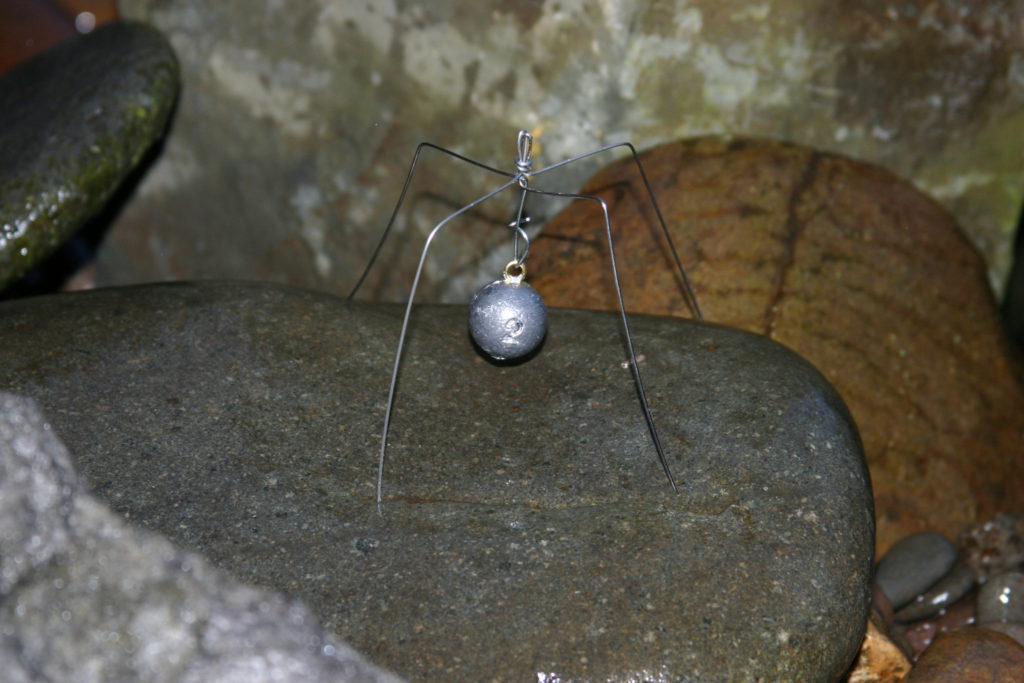
Step 6: Bend all four legs of the spider out at 90º angles. The short, softer piece of wire in the center hangs straight down, and will soon become the sinker clasp.
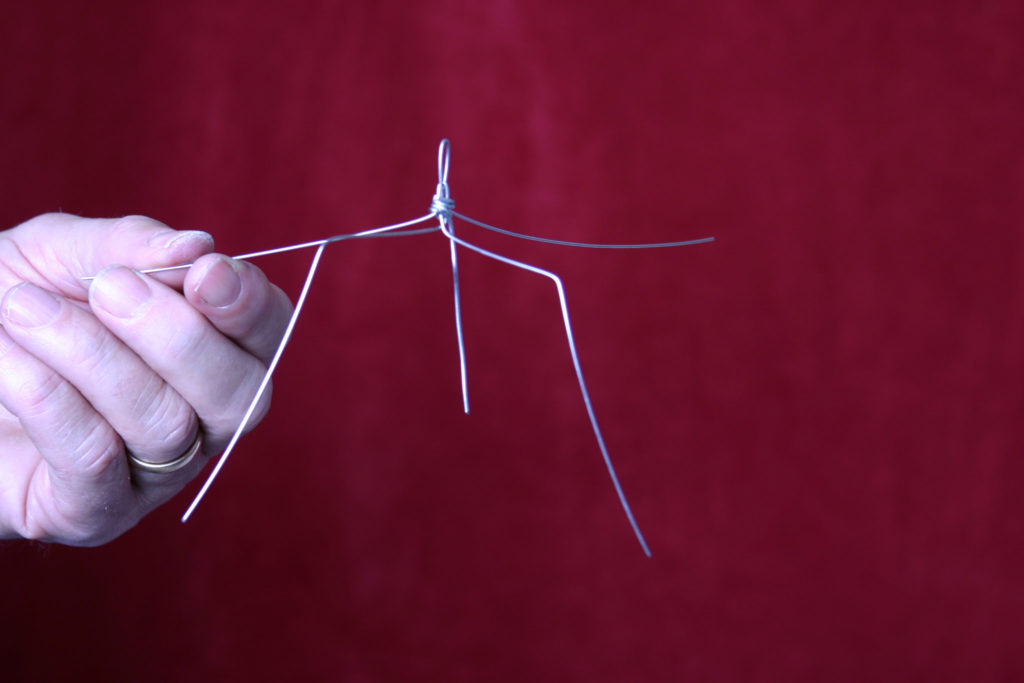
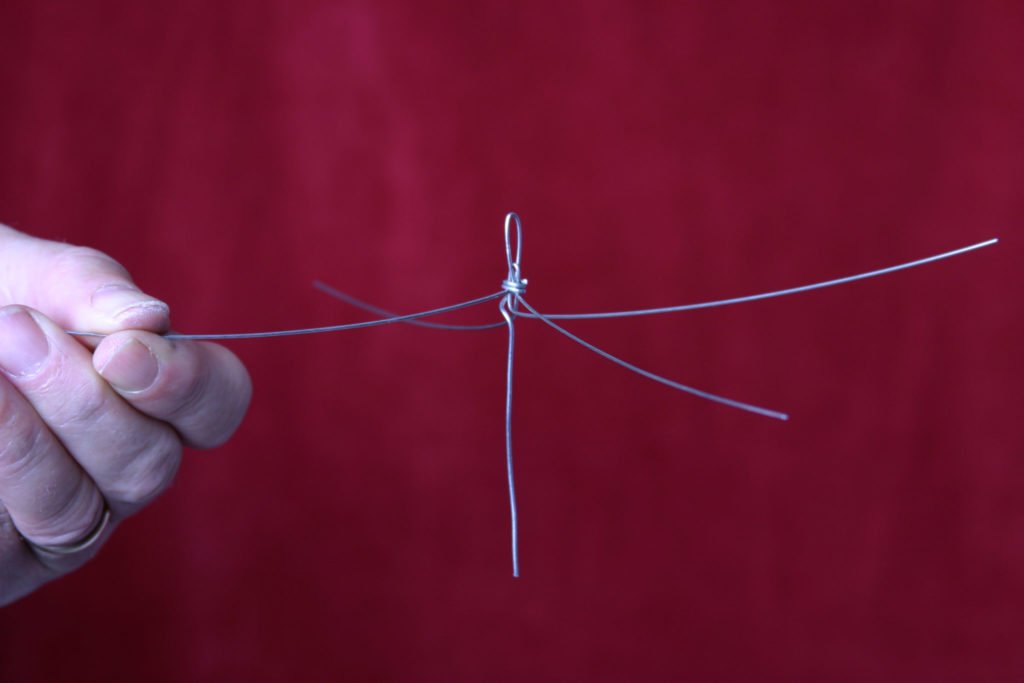
Step 7: About 1 1/2” below where the wires are twisted together below the loops, bend each leg downward about 75º. The angle of these bends will ultimately be determined by the size of sinker being used. The sharper the angle of the bend in each leg, the more upright the spider will sit. Be sure not to get too steep of an angle in the bends of the legs, for when the spider lays on it’s side, the sinker must still be suspended off the rocks. At this point you begin to see how the spider will act as a cage to encapsulate the sinker.
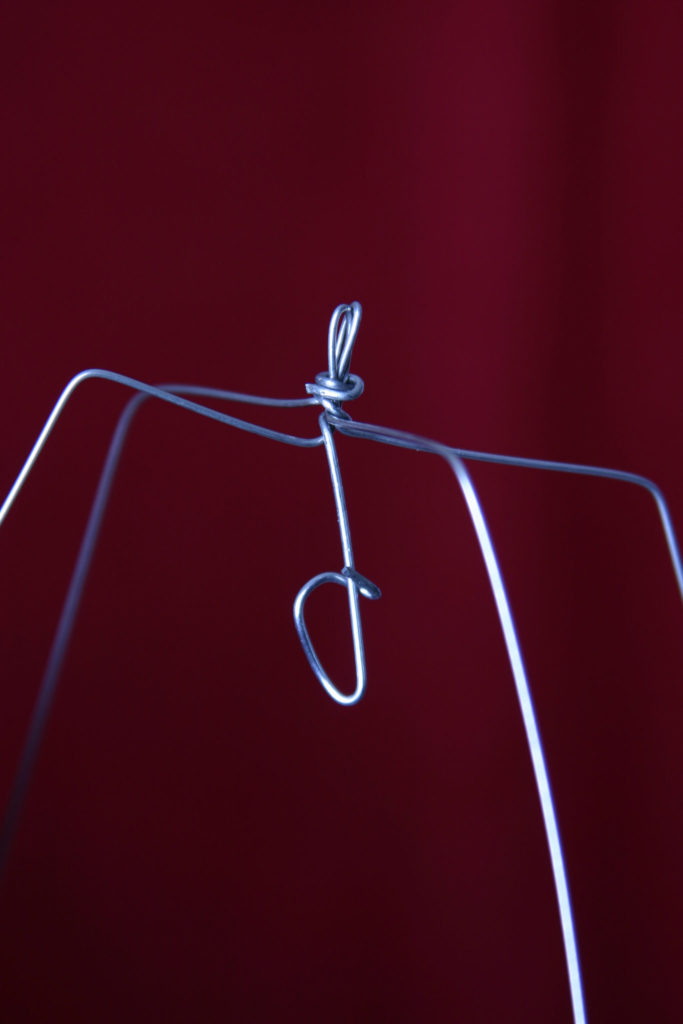
Step 8: With a pair of pliers or strong fingers, bend the hanging, soft strand of wire upward at roughly its midpoint. Next, bend the end of the wire back around itself, leaving a little clasp that the sinker can be slid on to. The snap will be centered beneath and fairly close to the original loops of the legs, so it cradles the sinker in the center of the spider. Be sure to make the snap so you can change sinkers as needed. My favorite sinker of choice to use in the spider is a cannon ball style. This round ball is held close to the center of the cage, so when the spider tips on it’s side, it still keeps the sinker suspended off the bottom. Teardrop, or bank sinkers, are a good second choice; just make sure the spiders legs are long enough to keep the sinker from contacting rocks, no matter what position it’s in.
There you have it…a spider sinker. All four legs and the sinker-snap should be firmly held in place, not collapsing on themselves at any point. The loops made in the first stage of the spider now become the point to where you tie your dropper line.